How to Upload Iphone Photos Without Photo Sharing
Are you lot struggling with how to transfer photos from iPhone to figurer? With so many different photo transfer apps and methods, it's not surprising y'all're dislocated. Whether you've got a Mac or PC, this step-by-step tutorial shows you how to import photos from your iPhone. Read on to detect how to transfer photos from iPhone to PC or Mac.
This tutorial has ii main sections. Section 1 covers how to copy photos from iPhone to PC (Windows). Section 2 covers how to download photos from iPhone to Mac.
In that location are several dissimilar methods for copying photos from your iPhone to computer. Some involve connecting your iPhone to the computer with a USB cablevision. Others allow you to transfer images wirelessly and automatically.
Table Of Contents: How To Transfer Photos From iPhone To Computer
Click any championship link beneath to go straight to that section of the tutorial:
Section 1: How To Transfer Photos From iPhone To Windows PC
- iCloud Photo Library On Windows PC
- Windows Photos App
- Windows AutoPlay Options
Section 2: How To Transfer Photos From iPhone To Mac
- iCloud Photo Library On Mac
- Photos App On Mac
- Image Capture App On Mac
- AirDrop
USB Cablevision Or Wireless Transfer?
First you need to decide whether you want to transfer your photos wirelessly or with a cable.
If using a cable, you'll need to connect your iPhone to a USB port on your computer using the Lighting cable. This is the cablevision you use to charge your iPhone.
If you'd prefer not to utilise a cable, you can transfer your images wirelessly using iCloud Photo Library or AirDrop.
What Is iCloud Photo Library?
iCloud is Apple tree'southward online information storage service. iCloud Photo Library lets you lot store your entire photo collection in iCloud.
Photos in the iCloud Photo Library automatically download to all your other iCloud devices. This includes your iPhone, iPad, Mac or Windows PC. Photos transfer over Wi-Fi, so there'due south no need for any cables.
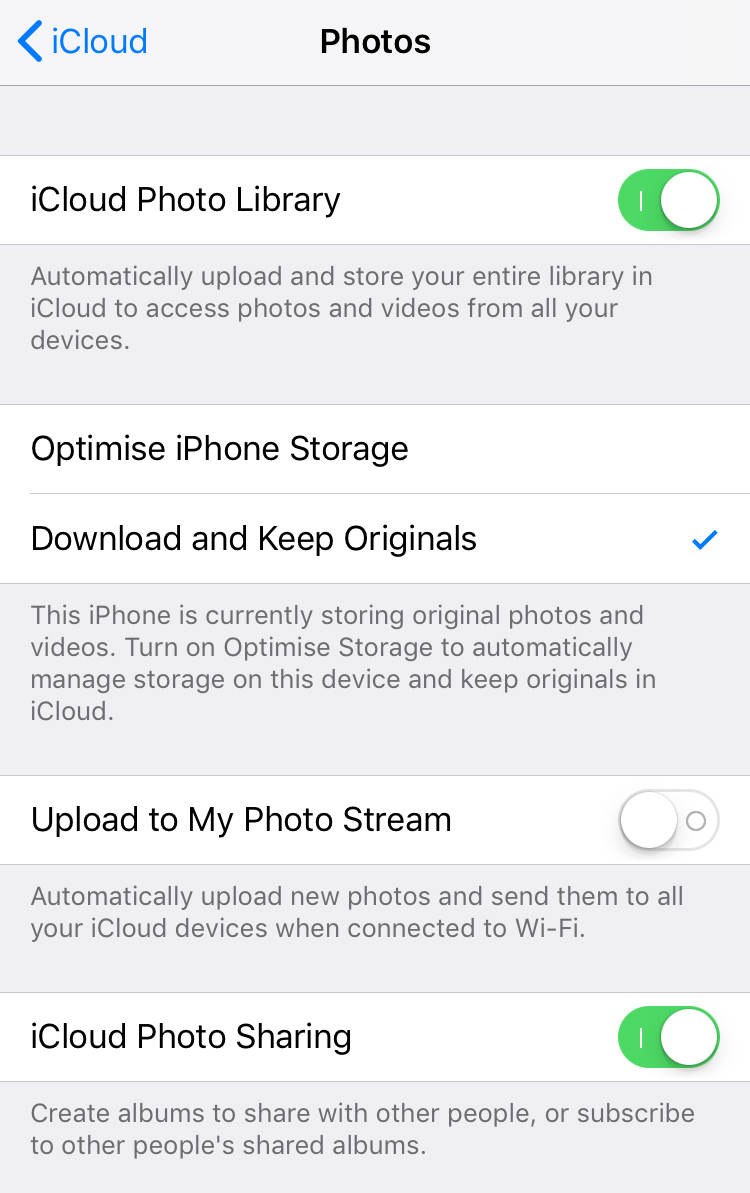
To switch on iCloud Photo Library on your iPhone, go to Settings > [your name] > iCloud > Photos. When the iCloud Photo Library pick is on, your entire photo library will upload to iCloud.
To use iCloud Photo Library, you'll need to ensure you have enough iCloud storage. On your iPhone, get to Settings > [your name] > iCloud > Manage Storage.
Apple gives you 5GB of complimentary iCloud storage. Merely if you lot have a lot of photos, you lot'll need to buy more than storage. iCloud storage plans start at $0.99 a month for 50GB.
If you choose not to employ iCloud Photo Library, you lot can manually transfer photos to your computer using a USB cable.
Note that iCloud Photograph Library is different to iCloud Photo Sharing. If yous desire to share your photos with other people, iCloud Photo Sharing is the perfect option.
Section 1: How To Transfer Photos From iPhone to PC (Windows)
Below you'll discover how to import photos from iPhone to PC (Windows). The iCloud method transfers your images automatically and wirelessly. The other two methods show you how to transfer pictures from iPhone to PC using a USB cablevision.
1. iCloud Photo Library On Windows PC
iCloud Photo Library makes it easy to transfer pictures from iPhone to PC. Once it's set up, any new photos you have volition automatically download to your Windows computer.
In this section, you'll learn how to download pictures from iPhone to computer using iCloud For Windows.
Outset, ensure you switch on iCloud Photo Library on your iPhone. Go to Settings > [your name] > iCloud > Photos. Switch on iCloud Photo Library to ensure your photos get stored in iCloud.
Next, brand certain you have the iCloud For Windows software installed on your computer. If y'all don't already accept it, click hither to download it from the Apple tree website.
On your computer, openiCloud For Windows. Sign in with the same Apple ID as your iPhone. To switch on iCloud Photo Library, check the box next to Photos:
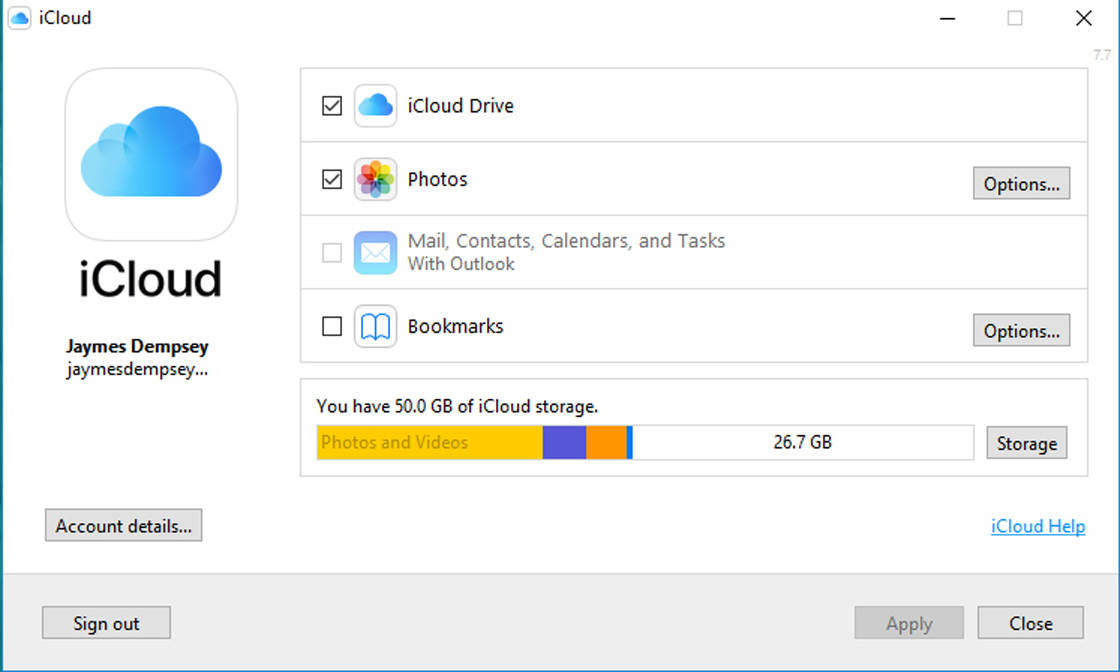
Now click Options next to Photos. Check the iCloud Photo Library box:
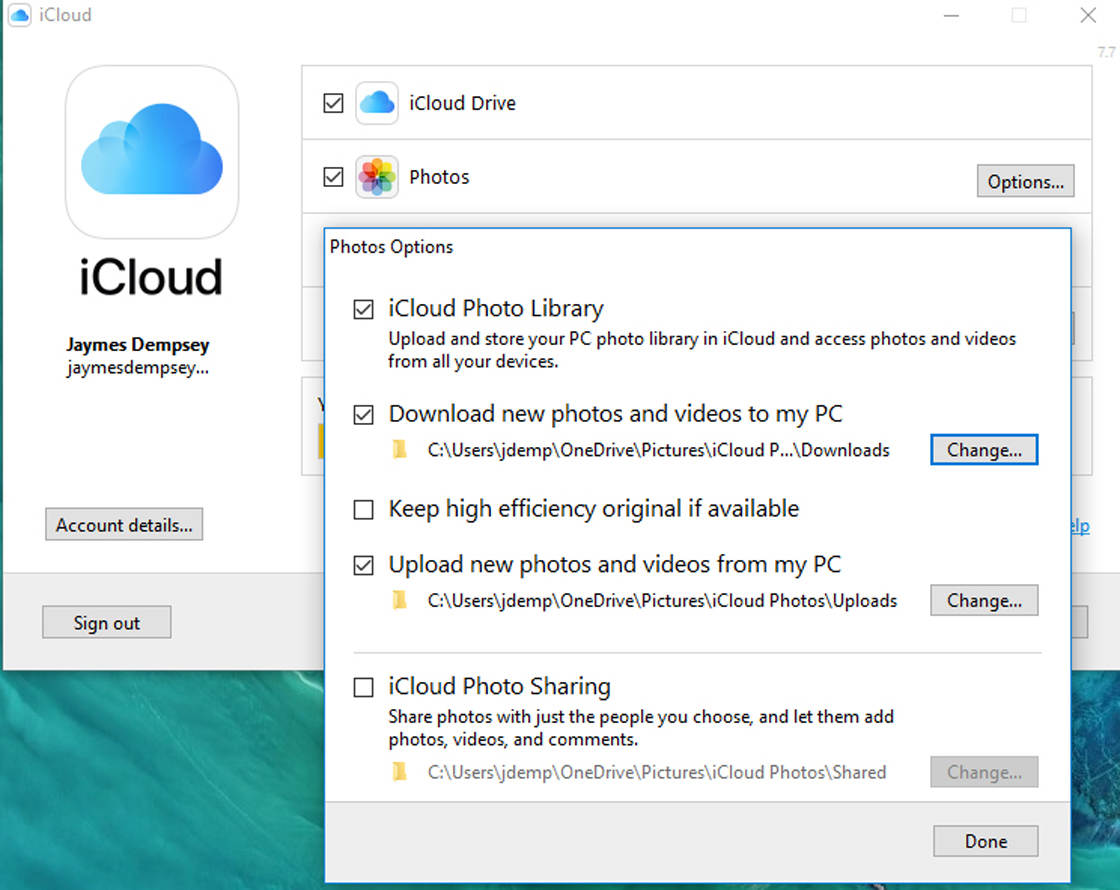
Do y'all want new photos from your iPhone to automatically download to your computer? Check the Download New Photos And Videos To My PC box.
Do you want photos from your PC to automatically upload to iCloud and then you lot can access them from your iPhone? If so, cheque the Upload New Photos And Videos From My PCbox. Uncheck this box if yous don't want photos from your estimator in iCloud.
When you've selected your preferences, click Done, then Utilize. At present, whenever you take photos on your iPhone, they'll download to your computer (as long equally yous take Wi-Fi).
Then how do yous find these images on your computer? Open File Explorer, and then open up iCloud Photos from the Pictures library or the left-manus sidebar:
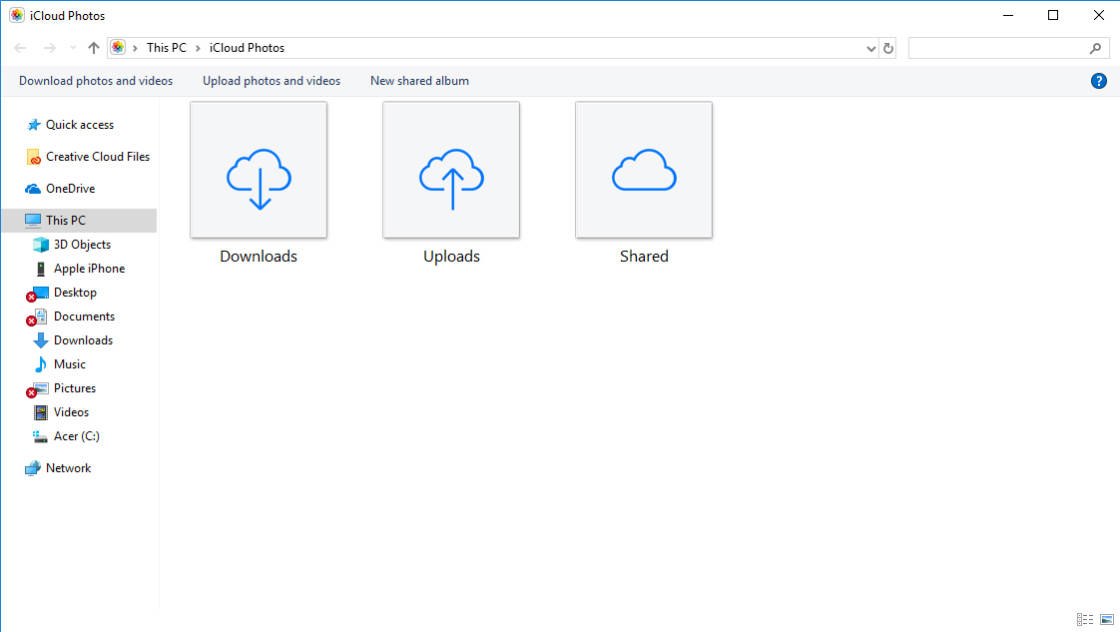
In the iCloud Photos folder, pictures from your iPhone will appear in the Downloads folder. If you wish, yous can and then copy or move them to some other folder on your computer.
You tin can also download your iPhone photo drove past year. In the iCloud Photos folder, click Download Photos And Videos. Select the images yous desire to download, then click Download.
2. Windows Photos App
On Windows 8.1 and Windows 10, the Photos app on your figurer provides an easy way to import photos from iPhone to PC. This method involves connecting your phone to the computer with a USB cablevision.
Before you start, ensure yous take the latest version of iTunes on your PC. You'll need iTunes 12.5.1 or later on.
To check this, open iTunes, then clickHelp. Side by side, tapBank check for Updates, and follow the instructions to install the newest version of iTunes.
Connect your iPhone to your computer with the USB Lightning cable. Unlock your iPhone using your passcode if prompted. You might also see a prompt on your phone asking yous to Trust This Calculator. Tap Trust or Allow to continue. Then open the Photos app on your PC.
If you lot have a Windows x computer, follow these instructions:
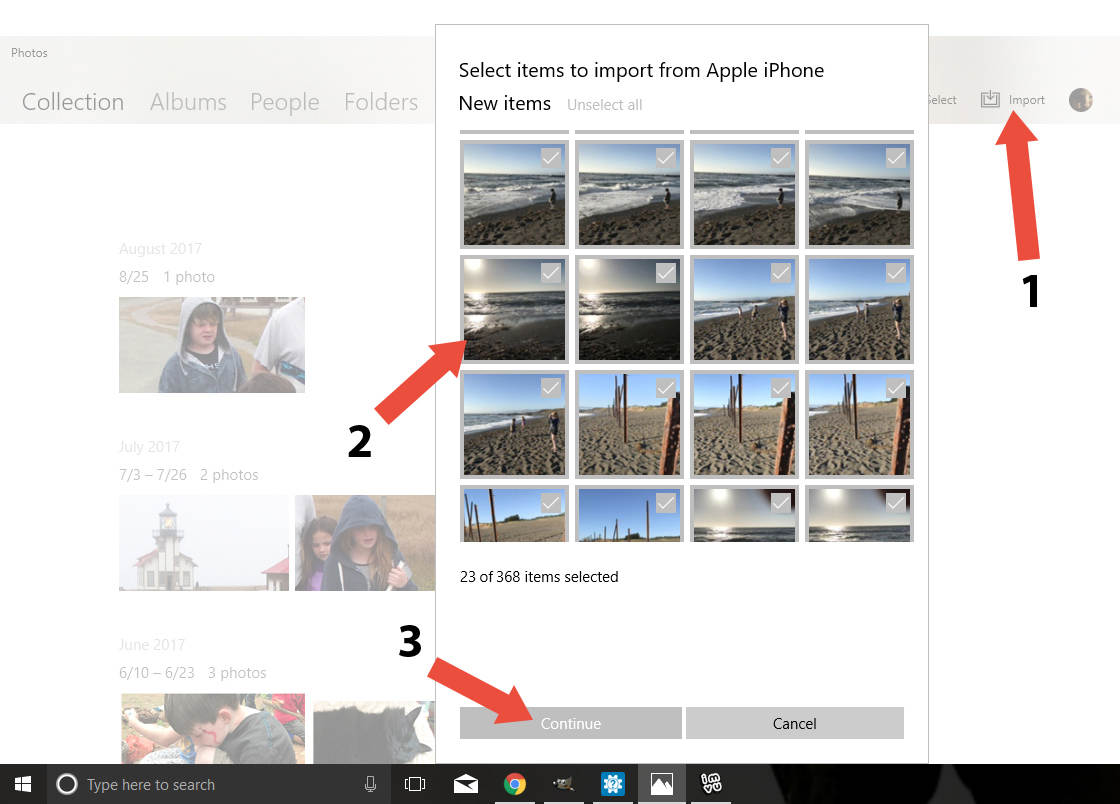
You'll be given the option to import your photos. The push volition exist in the peak right corner of the screen. ClickImport. Choose the items y'all'd like to transfer.
When prompted, clickGo on. Then clickImportonce again.
(Alternatively, y'all may just be given the choice to clickImport Selectedinstead ofKeep > Import. If this is the case, click it when prompted.)
Now your images will begin to download to your computer!
If you have a Windows 8 Computer, follow these instructions:
After opening the Photos app, right-click anywhere on the screen. The option to import your photos will announced. ClickImport.
Adjacent, select all the items you lot want to transfer to your PC.
Finally, clickImportover again. Your pictures volition brainstorm to transfer to your PC.
Past default, Windows saves the photos into the Pictures library. They will be organized automatically past date.
3. Windows AutoPlay Options
If you have Windows seven you won't have the Photos app on your PC. But you can use the AutoPlay options to import photos from your iPhone. You can besides use this method on Windows 8.1 and 10 machines if you lot don't want to utilize the Photos app.
Connect your iPhone to your computer with the USB cablevision. Your phone might ask if it'south okay to trust the computer. Tap Trust, and enter your passcode to unlock your phone.
The AutoPlay window appears on your computer screen when your iPhone is connected. This window offers several options:
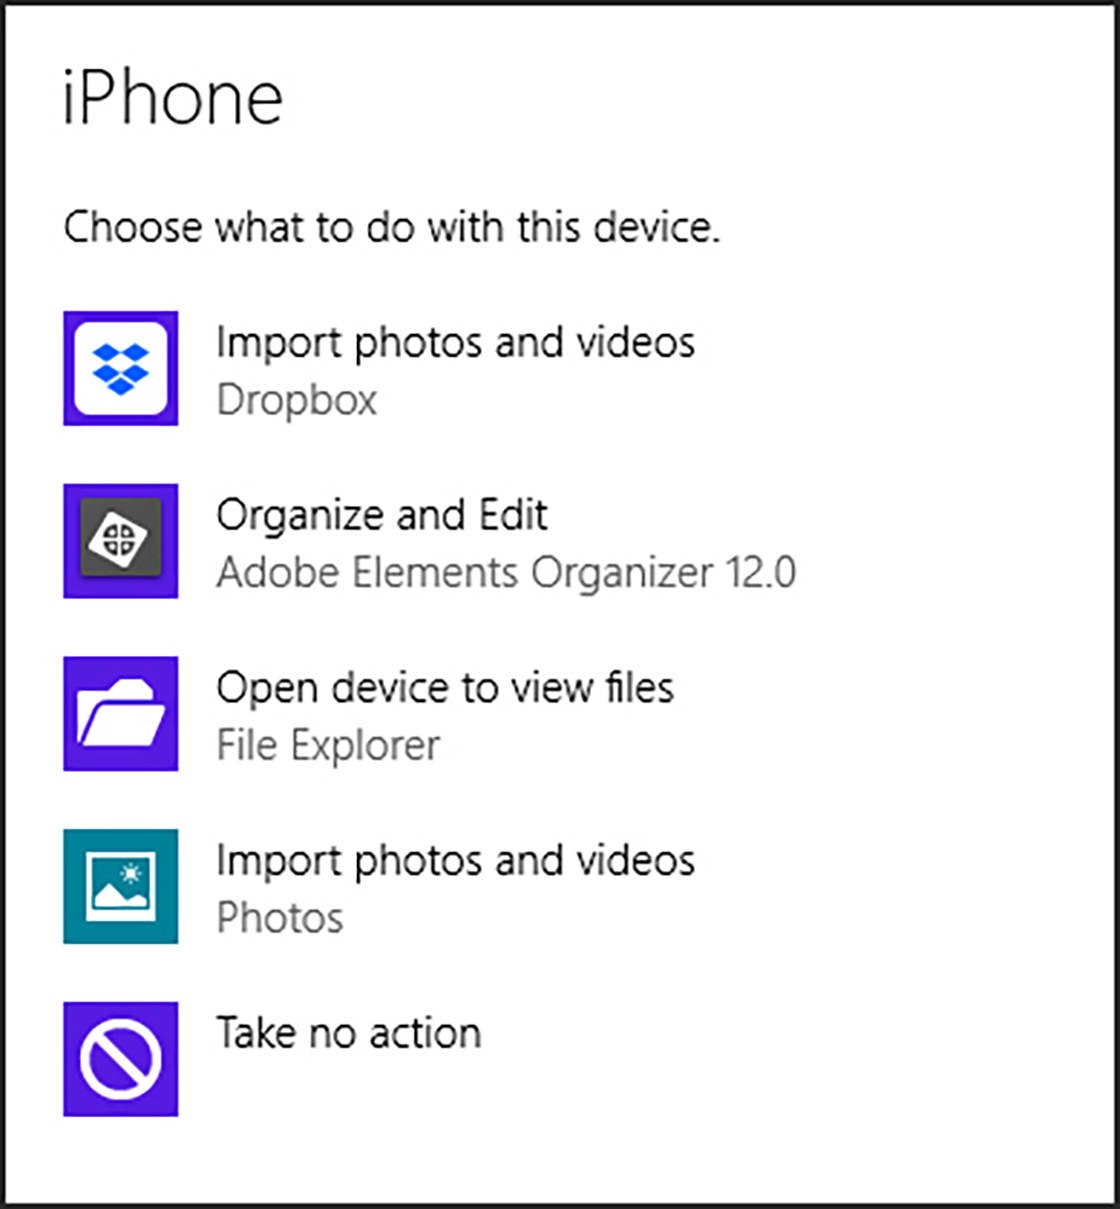
To import new photos from your iPhone in a single footstep, click Import Photos And Videos (Photos). With this option, Windows detects the newest pictures on your device. Information technology then imports them into a folder in the Pictures library.
The binder is automatically named with the date you imported the photos. It won't import duplicate versions of older photos that you've already copied to your PC.
During the import process, you tin can tag the photos with a descriptive tag proper noun if you wish. If you add together a tag, this volition appear in the folder name along with the date. Click Import to get-go importing your photos. Call back, you'll detect the imported photos in the Pictures library within a folder with the import appointment.
If yous adopt to choose which images to import, select Open Device To View Files when the AutoPlay window appears. This allows you to copy and paste or drag and drop your images from iPhone to PC.
If you choose this option, you'll run into a window that shows your iPhone as an Internal Storage device. Double click this icon to open the folder directory on your iPhone:
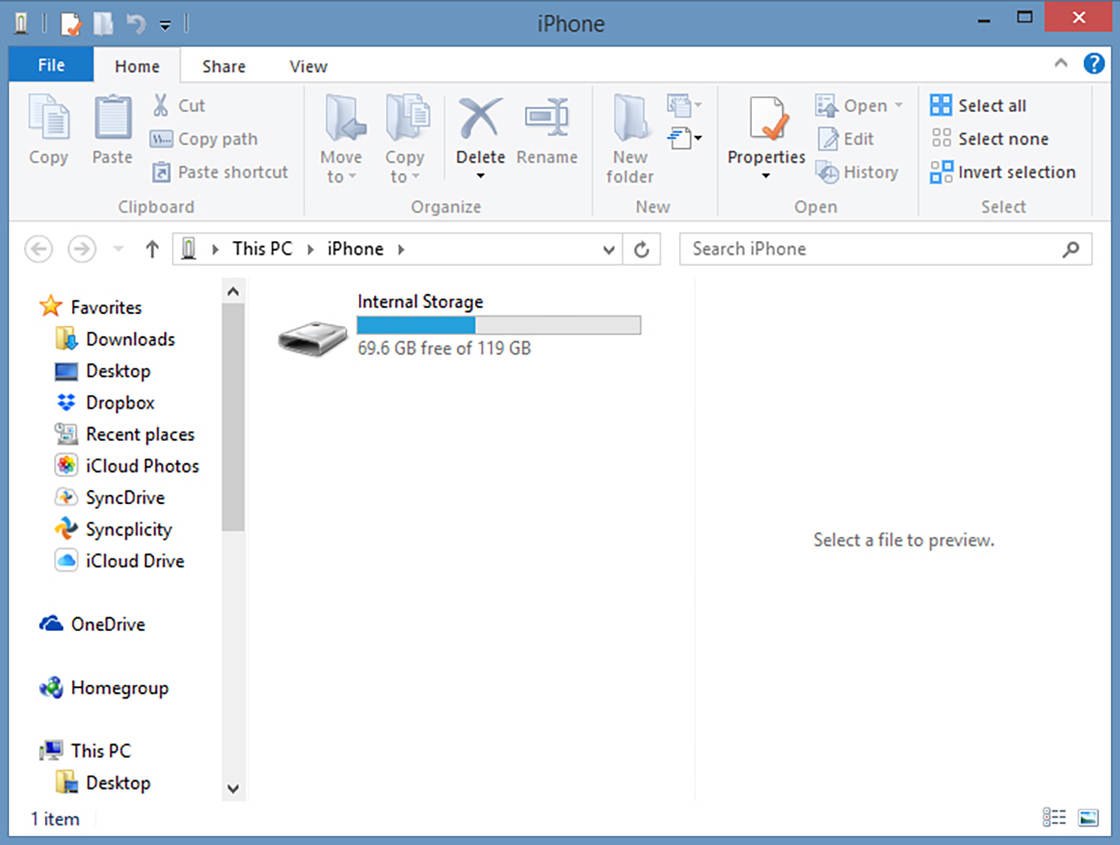
Double-click the folder called DCIM (brusk for Digital Camera Images). Y'all'll see 1 or more folders named something like 100APPLE, 101APPLE, etc. These are where the iPhone stores your photos. Double click a binder to view the images within information technology.
Select the photos you want to transfer to your figurer. You lot can at present drag and drop them onto the Pictures library in the left-hand sidebar. Or y'all can copy and paste them into the Pictures library – or any other location. To copy and paste, use the icons in the top toolbar, or right-click to access these options.
Later on importing photos onto your computer, y'all can and so farther organize them into different folders if you wish.
Department 2: HOW TO TRANSFER PHOTOS FROM IPHONE TO MAC
In this section, you'll acquire how to import photos from iPhone to Mac. The iCloud method transfers your images automatically and wirelessly. AirDrop is another wireless transfer option. You can also use the Photos app or Image Capture app to copy pictures using a USB cable.
1. iCloud Photo Library On Mac
iCloud Photo Library makes for seamless transferring of images from iPhone to Mac. With iCloud Photo Library enabled, the Photos app on your Mac volition sync with the Photos app on your iPhone. Whatsoever new photos you take with your iPhone volition automatically download to the Photos app on your Mac.
In this section y'all'll learn how to download photos from iPhone to figurer (Mac) using iCloud Photo Library.
To sync the Photos apps on your iPhone and Mac, enable iCloud Photo Library on both devices. On your iPhone, go to Settings > [your name] > iCloud > Photos. Switch on iCloud Photo Library to ensure your photos become stored in iCloud.
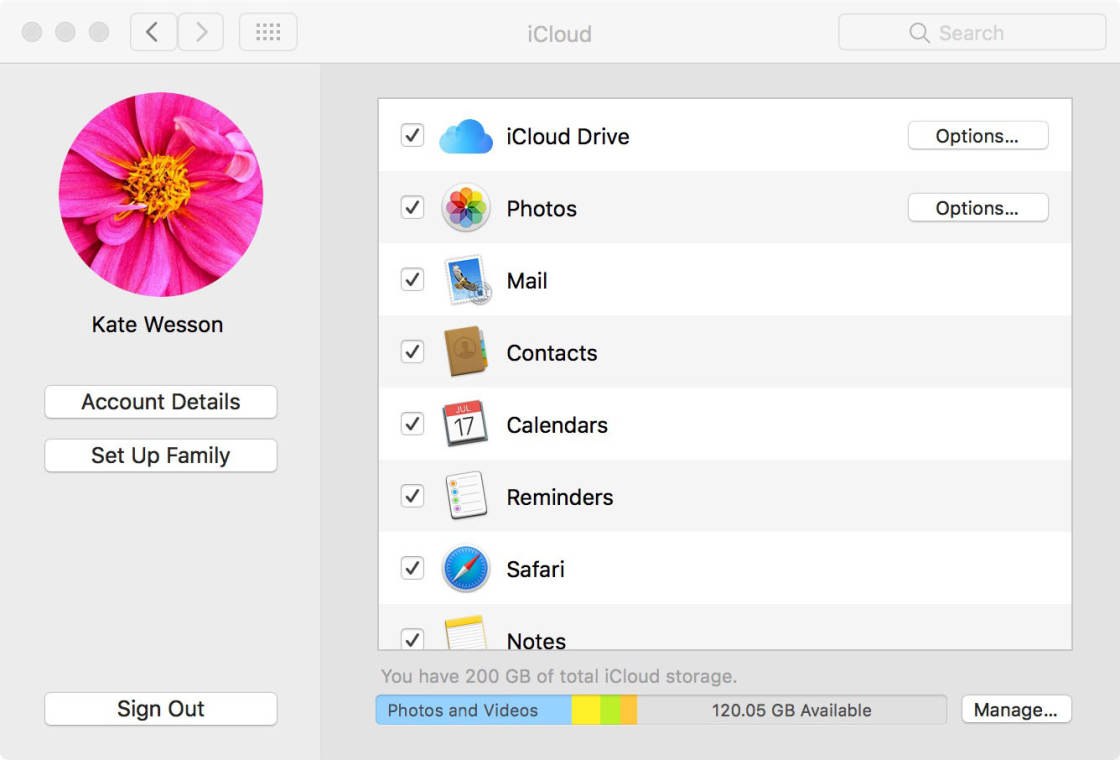
On your Mac, go to System Preferences > iCloud. Select the Photos checkbox, and so click Options next to Photos:
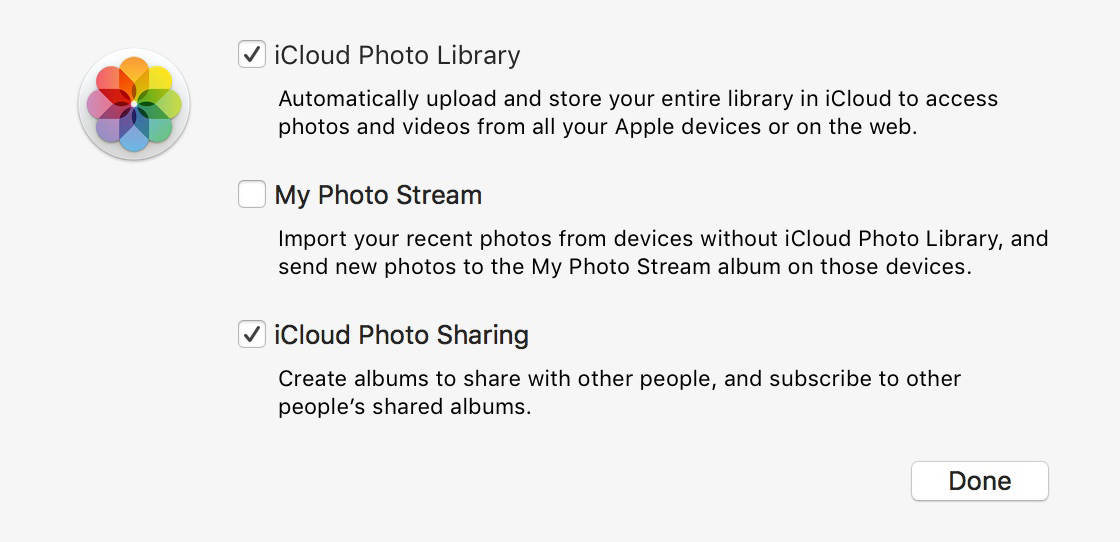
Select the iCloud Photo Library checkbox, and so click Washed, and close the Organization Preferences window:
When you beginning switch on iCloud Photo Library, you'll need to wait a while for the photos to sync between your iPhone and Mac.
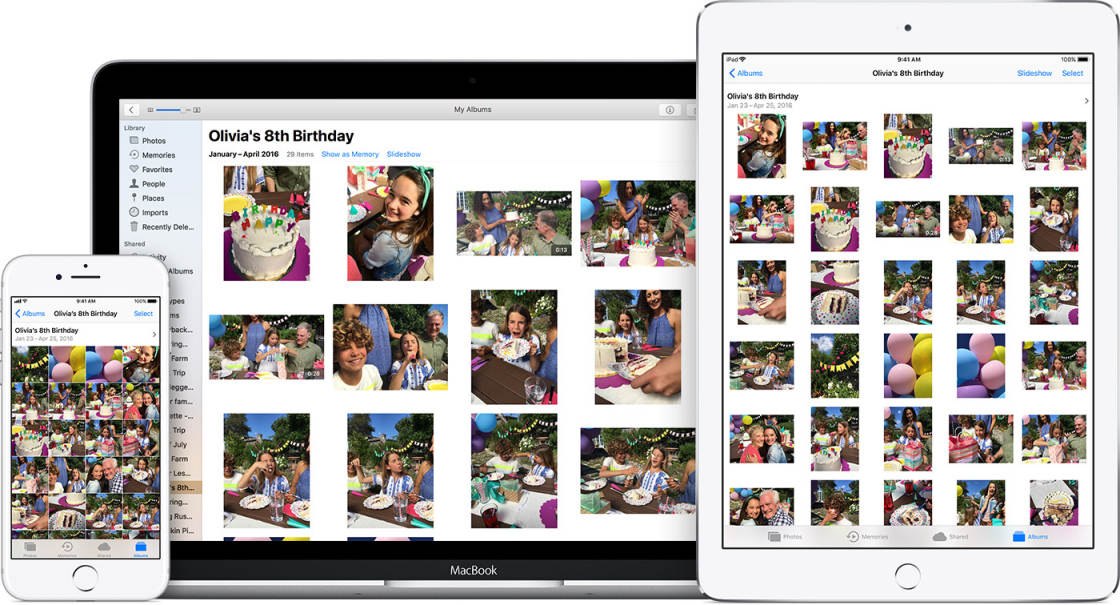
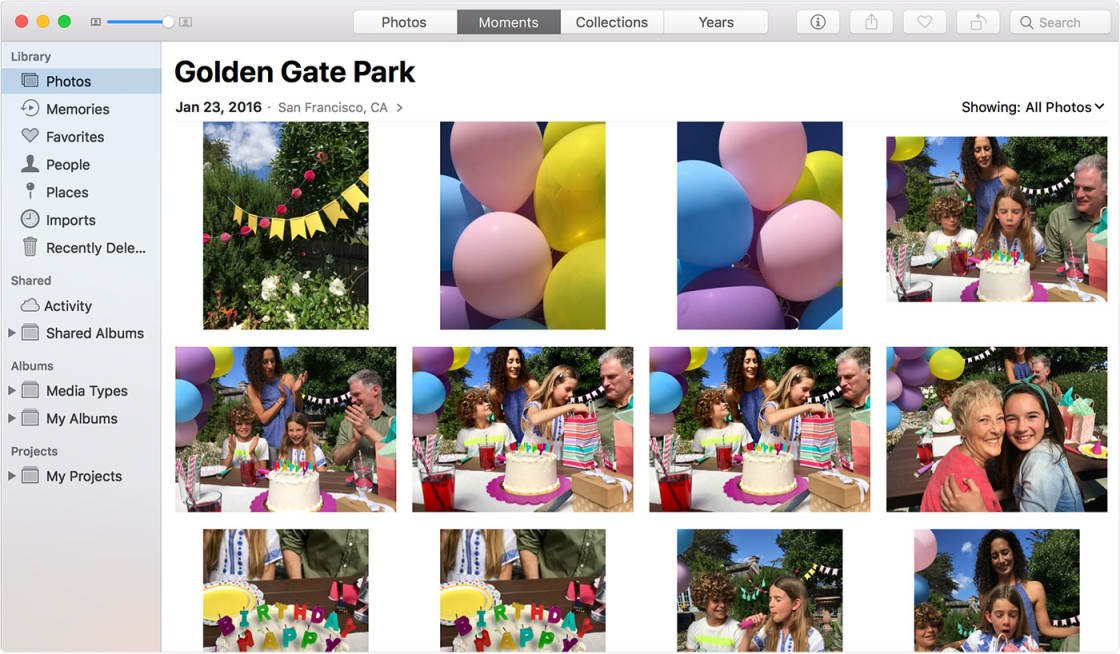
When the two devices are synced via iCloud, the Photos app on your Mac volition display the same collection of photos that you come across on your iPhone:
The Photos app on your Mac will exist an verbal copy of the Photos app on your iPhone. It's fifty-fifty organized in the same style as the Photos app on your iPhone. For example, if you organize photos into albums on your iPhone, those same albums will appear on your Mac.
Deleting images from the Photos app on your phone will delete them from the Photos app on your Mac. And vice versa.
To delete photos from your iPhone, but go along them on your computer, you'll need to export them onto your difficult bulldoze. To do this, open the Photos app on your Mac and select the images you desire to export.
Click File > Export > Consign Photos. Set up your export preferences, and then click Export. Choose the folder you want to export the photos to (this could be on your Mac's hard bulldoze or an external bulldoze). Click Consign to copy the images from iCloud Photos Library to your figurer'due south hard drive.
2. Photos App On Mac
What if y'all don't want to use iCloud Photo Library to auto-download photos from your iPhone to Mac? If this is the example, you can import them manually into the Photos app.
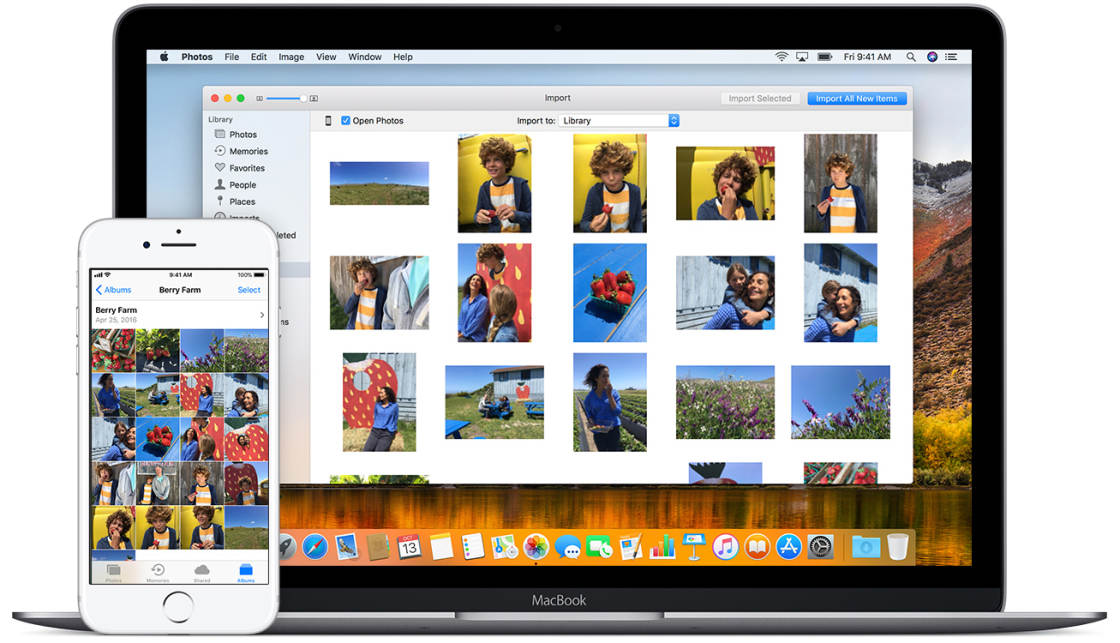
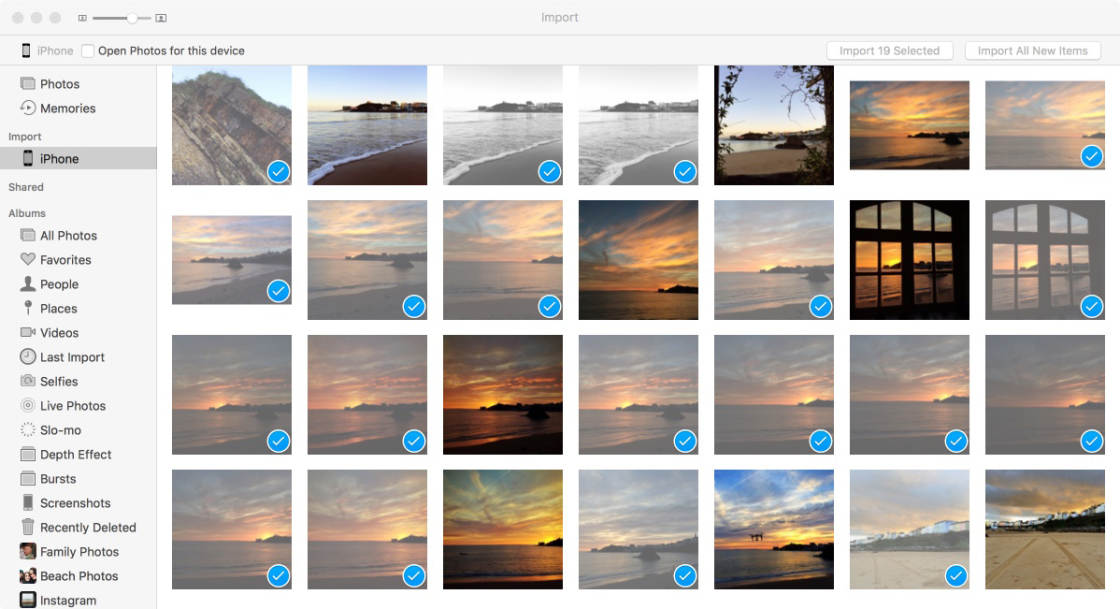
Connect your iPhone to your Mac with the USB Lighting cable (charger cable). Open the Photos app on your Mac. Under Import in the left-hand sidebar, click iPhone. Unlock your iPhone with your passcode if prompted.
Select the images you want to copy from your iPhone, so click Import Selected at the acme right. Or you can click Import All New Items to import all new photos since your concluding import:
Imported photos will appear in the Terminal Import album in the left-mitt sidebar. They'll also appear in the All Photos album.
To re-create these images to a folder on your Mac's hard drive or external drive, go to File > Export > Export Photos.
3. Paradigm Capture App On Mac
Image Capture is another app yous can use to copy photos from your iPhone to Mac. This app requires you lot to connect your iPhone to the computer with a USB cable.
Image Capture lets you import photos straight into a folder on your Mac's hard drive (or an external drive), rather than into the Photos app. This method is useful if you like to have your photos organized into folders on your hard drive. Y'all tin always import them into the Photos app from your hard bulldoze afterwards.
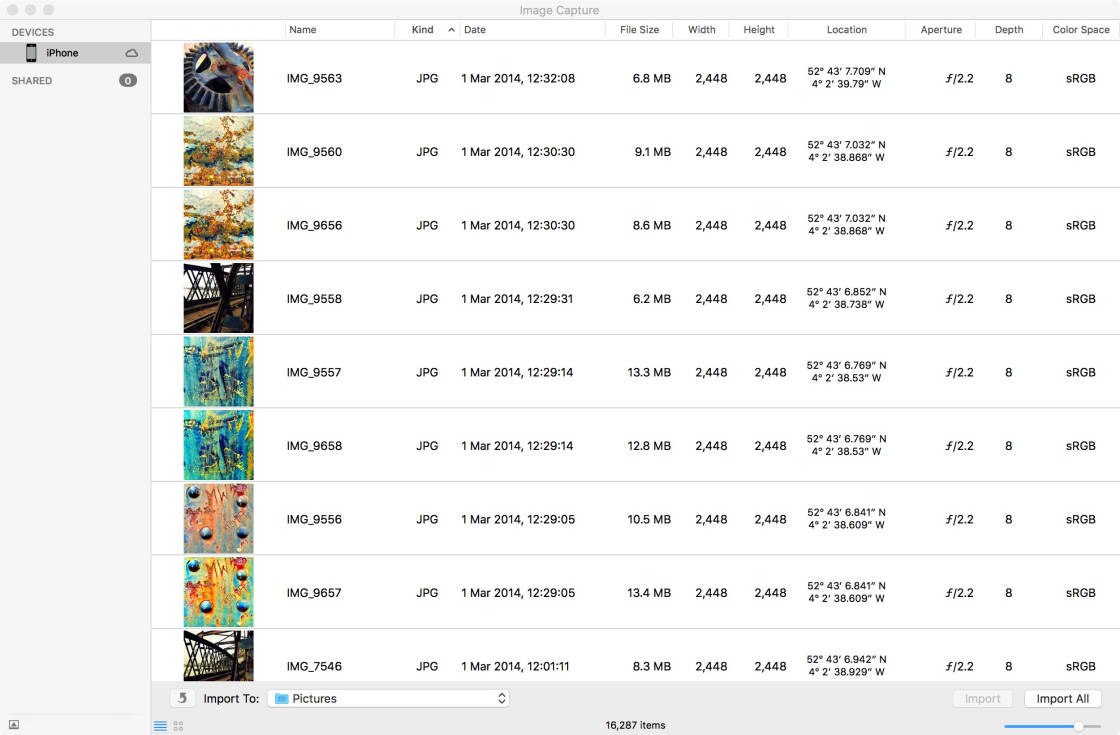
Connect your iPhone to your Mac using the USB cablevision. Open the Prototype Capture app on your Mac, and unlock your iPhone if prompted. Select iPhone in the Devices section on the left of the window. Your iPhone photos volition appear on the right:
Now select the photos you want to import. Concord down the Command fundamental to select private photos. Or to select a grouping of images, click the beginning photograph, hold downward the Shift key, then click the concluding photograph.
Click into the Import To box at the lesser of the window, and select the folder you desire to copy the photos to. To view more folders or make a new folder, click Other in the popular-upwardly list:
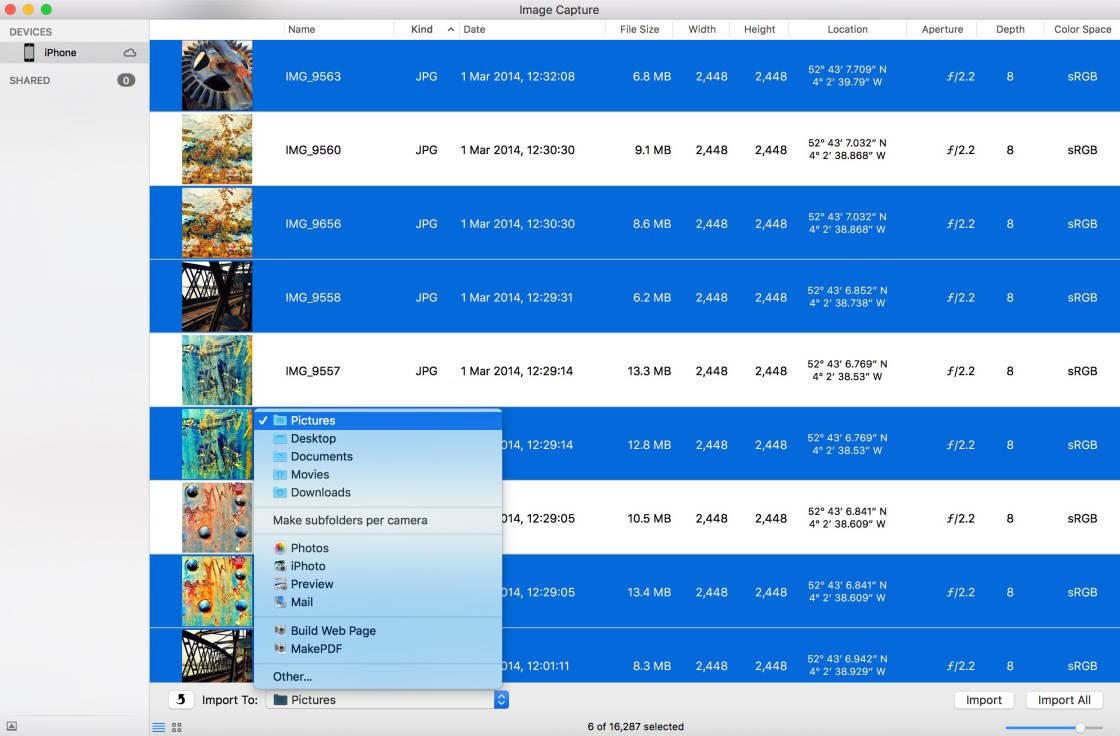
Click Import at the lesser right to transfer the selected images to your reckoner. Alternatively, you can import all images from your iPhone by clicking Import All.
4. AirDrop
Apple's AirDrop feature lets you wirelessly share your photos with other nearby Apple devices. So if you take a Mac, you tin can employ AirDrop to transfer photos from your iPhone to calculator.
To employ AirDrop, ensure your iPhone has Wi-Fi and Bluetooth turned on in Settings. Or swipe upwards from the bottom of the screen, and so make sure the Wi-Fi and Bluetooth icons are both blueish:

Your Mac as well has to have Wi-Fi and Bluetooth switched on. The icons for these are at the very tiptop of the screen.
Finally, ensure you're signed in to iCloud with the aforementioned Apple ID on both devices. On your iPhone yous tin sign in to iCloud past going to Settings > [your name] > iCloud. On your Mac, go to System Preferences > iCloud.
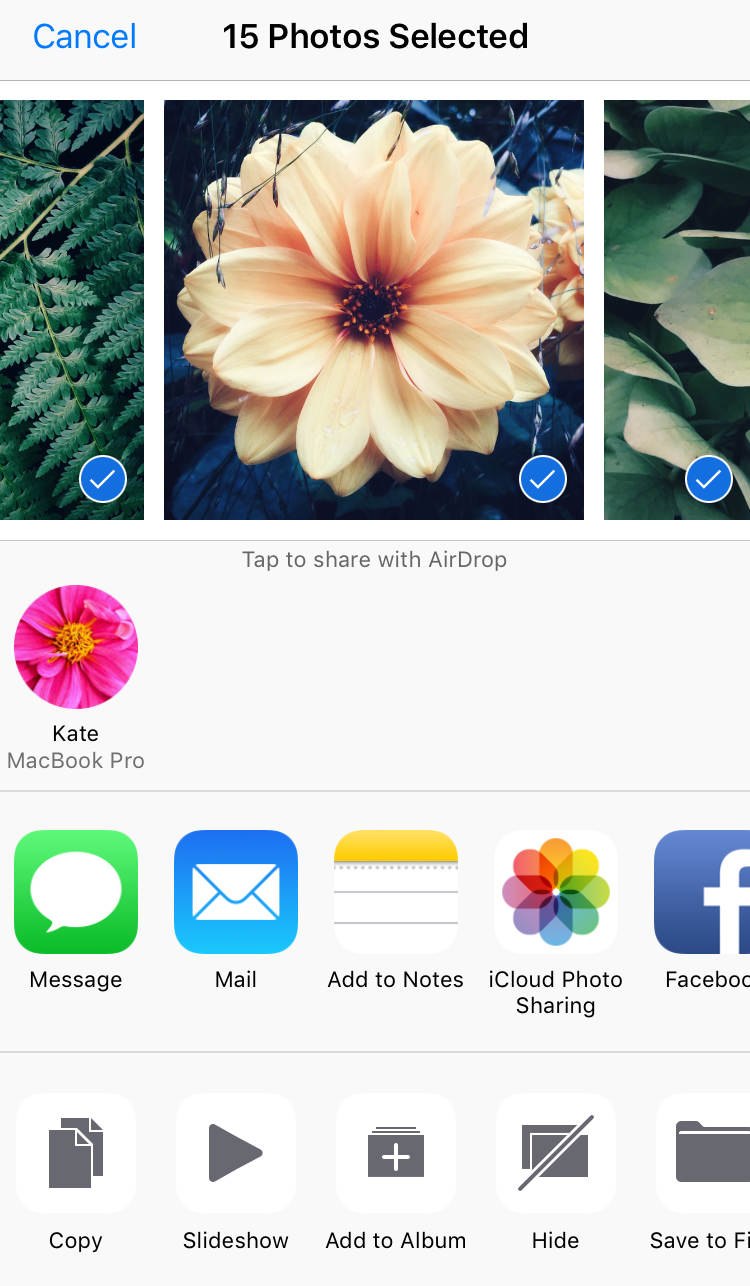
On your phone, open up the Photos app and locate the images yous want to re-create. Tap Select at the acme right, then select the photos you want to transfer. Tap the Share icon (square with up pointer) at the bottom left of the screen:
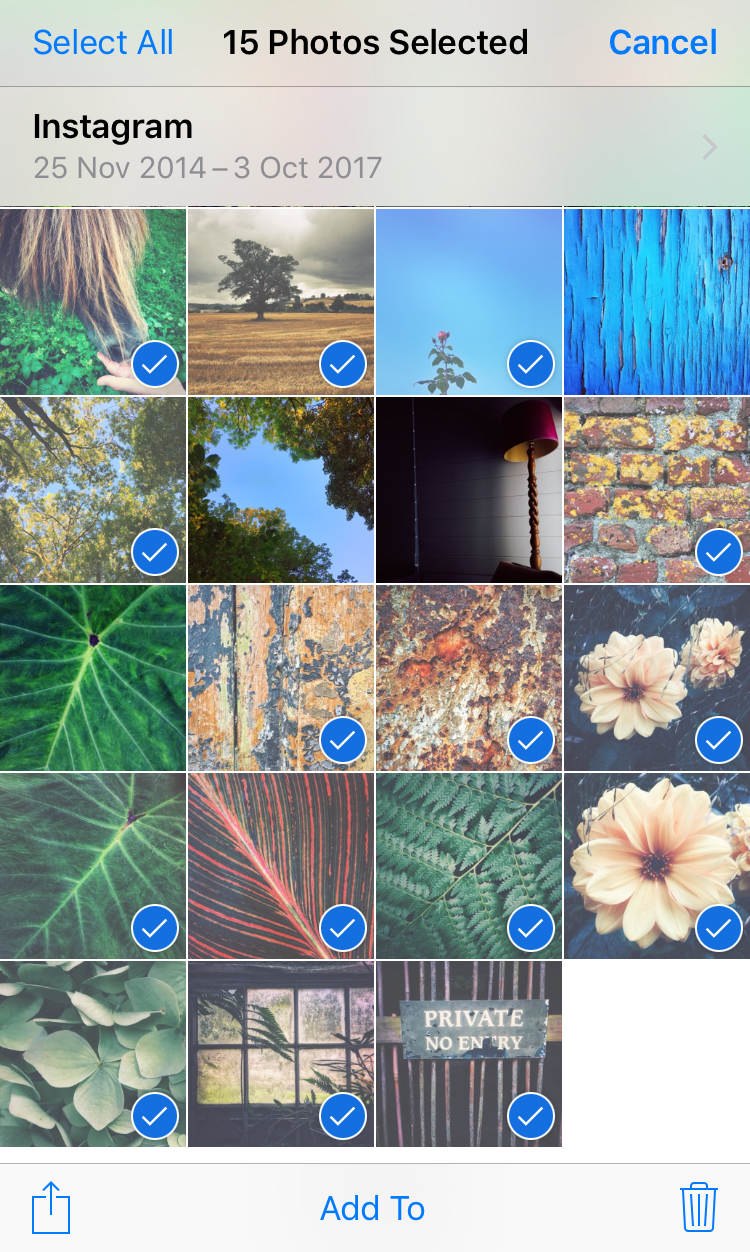
In the AirDrop department, you'll see the names of nearby Apple devices that have AirDrop switched on. Tap the proper name of your Mac to transfer the images from your iPhone:
Photos that you transfer to your Mac via AirDrop will announced in the Downloads folder. On your Mac, open Finder, then click Downloads in the left-hand sidebar. You can now move the photos from Downloads to a folder of your pick using drag and drop.
Source: https://iphonephotographyschool.com/how-to-transfer-photos-from-iphone-to-computer/
Posting Komentar untuk "How to Upload Iphone Photos Without Photo Sharing"